Points load tester should consider

From last 6-7 months, I was working closely on load testing of a couple of application. While working on it I realized few capabilities a responsible person should have.

1) One should have a good understanding of the application domain, even more than a functional tester. If one needs to craft the load test plan then he should be aware of how the user does use it. He should clarify his assumptions of how the system will be used. Recommended way is to observe few users, to understand better about application usage.

2) one should have a better understanding of the application architecture, how components interact? What is the difference between non-prod and prod system from an infrastructure perspective? What will be the network bandwidth? What will be the average think time? etc.

3) One should be technically strong and creative enough to gather the load test data or way to generate the load test data. This one is very critical to building independent, low maintenance, automated load test. One can have a utility which will run prior to the Load test to generate test data. A process of test data management is the key to having successful continues delivery with zero human interaction.

4) One should be able to identify the peak load details based on historical data. If the historical data is not available then one needs to come up with the approximate numbers. As load test may run for 1-2 hour, one needs to have a good combination of different transactions. NOTE: once you baseline the performance of each transaction through the full test (1-2 hours), in CD you can have tested for lesser numbers just to verify if the build is not impacting the baseline numbers. For major builds, one can run the full test.

5) And the key and important one, expert knowledge of the load testing tool, protocols, command-line or configuration options, how the tool works etc.

Points load tester should consider

Web App performance benchmarking – Realtime and End-to-End

OK, last night was thinking of benchmark performance of each component of web app, e.g. client, app server and data services.
There are great APM available in the market which gives you a good amount of information to start with, but still, I was thinking something is missing and want more. APM I tried and used is AppDynamics.

So now what is more we want, AppDynamics provides the analytics capabilities but it comes with the cost.😁 So what all other open-source tools can help.

ELK: this is the really good centralized log analysis tool which you can configure to meet your expectations. It has an inbuilt search engine(elastic search) and data visualization (Kibana), and to get the logs or data you have LogStash which supports multiple technologies to receive data. Using ELK one can get the high-level health of the application, e.g. success rate of the transaction, average response time, slow performing requests, application usage details etc. With ELK you are covered for application server and data services performance.

In ELK we can push the Apache web access logs which give you visibility to usage and performance of the application.

Using MDC filters one can push the service/method performance details to ELK and yes exception details.

OK all this is configured and available, what next? So we don’t have to keep monitoring logs n data we are capturing we can configure alerts (email) n dashboards. But my recommendation (if you ask 😎) monitor the logs for at least a week to see is your new setup is capturing the details you are expecting n then tweak the configuration accordingly.

Now the challenge is how you can monitor client performance and do we really need to monitor it real time?

My thought is, at least monitor it for pilot release to see how the user is adaptive to your new application and if there are any issues. Even I feel it’s more critical than server performance, as most of your testing, all kind of is done with a controlled environment (machines, network, internet speed, browser types and even user behavior). So to get an answer to the question, how the actual user is using your app n what challenges he is facing? Real time Browser performance metric/log will be a real help.


\\TODO
Thoughts on real-time client component performance and monitoring of web application.

Web App performance benchmarking – Realtime and End-to-End

Redis PROD Setup – Part 1

Recently worked on analysis to use Redis as a cache for REST services. Performed the basic configuration of Redis and ran the benchmark test on it and results were amazing. I have used the redis-benchmark to perform benchmarking. https://redis.io/topics/benchmarks

First test where I used 568 bytes data size for Get/Set

redis-benchmark -q -n 100000 -c 50 -P 12 -r 16 -d 568
PING_INLINE: 337837.84 requests per second
PING_BULK: 331125.84 requests per second
SET: 284090.91 requests per second
GET: 318471.31 requests per second
INCR: 444444.47 requests per second
LPUSH: 349650.34 requests per second
RPUSH: 352112.66 requests per second
LPOP: 392156.88 requests per second
RPOP: 390624.97 requests per second
SADD: 425531.91 requests per second
SPOP: 401606.44 requests per second
LPUSH (needed to benchmark LRANGE): 346020.75 requests per second
LRANGE_100 (first 100 elements): 354609.94 requests per second
LRANGE_300 (first 300 elements): 337837.84 requests per second
LRANGE_500 (first 450 elements): 343642.59 requests per second
LRANGE_600 (first 600 elements): 317460.31 requests per second
MSET (10 keys): 62227.75 requests per second

Second test where I used 1000 bytes data size for Get/Set, still there no huge decline in the throughput.

redis-benchmark -q -n 100000 -c 50 -P 12 -r 16 -d 1000
PING_INLINE: 369003.69 requests per second
PING_BULK: 416666.69 requests per second
SET: 277777.78 requests per second
GET: 367647.03 requests per second
INCR: 423728.81 requests per second
LPUSH: 277777.78 requests per second
RPUSH: 277777.78 requests per second
LPOP: 462962.94 requests per second
RPOP: 432900.41 requests per second
SADD: 373134.31 requests per second
SPOP: 403225.81 requests per second
LPUSH (needed to benchmark LRANGE): 251889.16 requests per second
LRANGE_100 (first 100 elements): 318471.31 requests per second
LRANGE_300 (first 300 elements): 317460.31 requests per second
LRANGE_500 (first 450 elements): 335570.47 requests per second
LRANGE_600 (first 600 elements): 325732.88 requests per second
MSET (10 keys): 41666.66 requests per second

My Redis setup is, 1 Master and 4 Slaves and I have configured the Sentinel to monitor the instances and on failure select the Master.

Redis.conf

    • Custom IP address bind configuration, used the private IP address instead on Public one.
    • Changed the default to port to the custom one.
    • One needs to select the Timeout setting carefully, this setting tells the Redis server when to disconnect the client if it’s ideal for N seconds. If you are considering this setup to use with Spring Cache then align this setting with your Jedis connection pool setting.
    • Log level for PROD instance needs to be kept at the lower side, as you may face server issues if your logs occupy more disk space than what is necessary.
    • Limit the maximum database your server wants to handle.
    • Snapshotting section is the critical one, here if you have the number of slaves then need to select the snapshot frequency accordingly. Redis does asynchronous sync with the slaves, but you need to consider a good balance between CPU and Memory usage and the time for the eventually consistent state. One can have multiple conditions to trigger the snapshot, e.g.
    • save 900 1 (after 900 seconds if there is one record changed)
    • save 300 10 (after 300 seconds if there are 10 records changed)
    • save 60 10000 (after 60 seconds if there are 1000 records changed)
  • Configure the Slave Master using “slaveof” and “masterauth” settings
  • slave-priority is another key configuration you need to consider if you are planning to use Sentinel. If the master is down then based on this configuration sentinel process identifies the next master. Lower priority one will be considered as next master. NOTE: Do not set it to 0, the value indicates that this Redis instance will not be promoted to Master, it will be always considered as Slave.
  • If you have separate IPs, Private and Public then based on challenges I faced, always use the private IP for binding to Redis server, and configure the announce-IP configuration to announce IP of Redis server which will have the Public IP address.
  • Always set the maxclient configuration.
  • Another tow very important configuration once should consider while configuring PROD server. We found this very useful when we performed load test on the Redis server to see how Redis performs with huge data sets. “maxmemory” this tells what is the max memory allocation for the Redis, maxmemory-policy configuration tells the Redis what to do when maxmemory threshold is reached, Redis has provided different strategies you can choose from.

NEXT : Detailed configuration of Redis Master, Slave, and Sentinel

Redis PROD Setup – Part 1

Protobuf Performance Comparison and points to make decision

What is Porotbuf?

Developed by Google for object serialization, its open source library and available for multiple languages. It’s a Fast buffer which does the object serialization, you can consider same as XML but it’s more faster, takes less size, serialization and deserialization is faster than any other available approach.

What is the procedure?

One need to define the object structure, it can be done by defining the .proto file, which defines required, optional fields of the object.

Once proto file is generated, one need to use supplied code generator, this utility is language specific and generates language specific code. If it’s used for java then you can consider that this utility generates the java pojo for serialization and de-serialization.

Now using supplied library, generated beans/models and .proto files, one can serialize or de- serialize the response.

Why should I use it?

  • JSON and XML transmit data with metadata details, and which adds load on payload, requires more memory compared to Protobuf. Protobuf compress the data, generate dense data. If compared to XML Fast buffers takes almost 1/3rd size and if compared to JSON then its ½.
  • JSON and XML are more readable and not secure to transmit data over the network. If you want your response shouldn’t be readable by user then you can use Protobuf.
  • Consumer of the service needs the .proto file to de-serialize the object stream.
  • Less CPU and Memory will be consumed for serialization and de- serialization, so processing time on mobile devices is faster compared to JSON

Comparison

Here I considered the web application which sends data using REST service, and a web page which renders the data on screen. I have used total time to render a page using JSON and Proto, end-to-end to make sure I am covering, serialization, data transmission, de- serialization and DOM rendering. I compared it with different network speed, broadband, 3G and 2G.


Network JSON Proto
Time Broadband 555 MS 359 MS
Payload size Broadband 1.2 MB 684KB
Time 3G (1Mb/S) 7.93 S 4.6 S
Payload size 3G (1Mb/S) 1.2 MB 684KB
Time (ms) 2G 22 S 13.73 S
Payload size 2G 1.2 MB 684KB
Network JSON Proto
Time Broadband 288 MS 293 MS
Payload size Broadband 512 KB 292 KB
Time 3G (1Mb/S) 2.91 S 1.86 S
Payload size 3G (1Mb/S) 512 KB 292 KB
Time 2G 9.80 S 6.06 S
Payload size 2G 512 KB 292 KB
Network JSON Proto
Time Broadband 229 MS 233 MS
Payload size Broadband 302 KB 269 B
Time 3G (1Mb/S) 318 MS 331 MS
Payload size 3G (1Mb/S) 302 KB 269 B
Time 2G 723 MS 808 MS
Payload size 2G 302 KB 269 B

Points to consider

  • If payload is larger than 300KB then one can gain more from speed and performance perspective.
  • If application needs to send smaller chunks of data (IoT case) then, need to think about if system really needs the status real time or if we can merge the events triggered and upload the payload after an interval. Need to ask question, which one is more applicable? sending 40KB payloads 10 times or sending a 400KB once?
  • Does application need object serialization which is platform independent, not human readable and takes lesser memory? If yes the go for ProtoBuf
  • I haven’t tested the serialization and de-serialization performance on smaller devices like mobile and IoT one. Definitely those will one more aspect to consider.
  • It’s not limited only for REST services which returns the data in JSON or XML to compare with, one can use Protobuf for MQ, RFC.
  • Protobuf makes more sense if you have same web application or rest services to be used by desktop and mobile devices.

I used Spring Boot for REST service, bytebuffer.js on JS side and Google Protocol buffer libraries.

Protobuf Performance Comparison and points to make decision

Raspberry Pi 2 – Sonic Pi

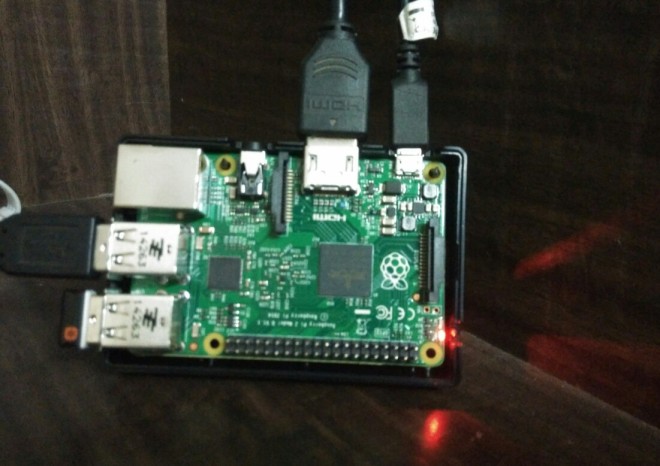
Ordered Raspberry Pi 2 as soon as I came to know its available for sale 🙂

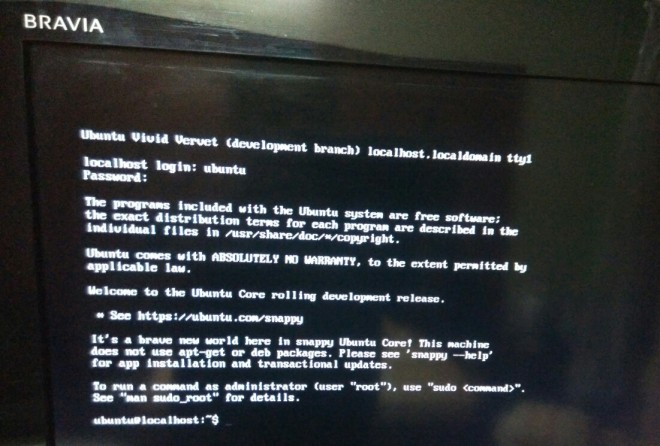
First impression, it’s really fast (if you have used previous version you will agree). I tried both linus distributions, Raspbian and Snappy Ubuntu, didn’t got much time to explore the Ubuntu one, but my kid liked the Raspbian most, because of the Sonic Pi and Mathematica.

Sonic Pi is the awesome open source programming tool for kids, and its fun while you learn programming. It covers, loops, conditionals, concurrency and data structures.

Raspberry in action :

IMG_20150216_232728-1

Snappy Ubuntu on Sony :

IMG_20150216_233046-1

Few updates in Raspberry Pi 2, which I loved

New 900MHz quad-core processor, 1GB memory and Combined 3.5mm audio jack and composite video.

Using Male 3.5mm to 3 RCA AV Audio Video Male Converter Cable, you can connect your Raspberry to any TFT screens or to TV which support RCA Video, cheaper one are the used in car for rear view.

http://www.ebay.in/itm/Male-3-5mm-to-3-RCA-AV-Audio-Video-Male-Converter-Cable-/201271068867?pt=LH_DefaultDomain_203&hash=item2edcb0c8c3

Or you can opt for a TFT LCD screen

http://www.ebay.in/itm/PORTABLE-7-5-LCD-TFT-SCREEN-TV-AV-USB-PHOTO-FRAME-WALL-MOUNTABLE-ALSO-/171660373963?pt=LH_DefaultDomain_203&hash=item27f7c16fcb

Raspberry Pi 2 – Sonic Pi

Maven – Quick Start

Many of my friends were facing similar kind of problem while configuring the maven, so thought to cover this topic in simple form

Disclaimer : Please consider this as a quick start guide, its not the in details one, and I tried to cover the same topic in different way.

How I look at Maven?

Maven is the tool which helps me to download/manage all required API for my project.

In old days, if you need to build a simple application which handles the MS Office files (excel, word), you have to search for the API, then on the API home page you need to go to the page which details out the all required jars to use that API, and yes few of API provider also has a ZIP file which contents all the dependent jar files, if there is any other jar dependency you need to download it from their site, and many of time you will face compilation or runtime issues as some of the jar is missing or its version is not compatible.

To fix this Maven and other build tools came into the picture, where you tell the tool the details of the repository, and the API you want to use. API provider add the details of the dependencies to use their API.

Repository : Its the server which stores the all required jar files, one of them is NEXUS, which stores the required files with their binary, source and versions. Nexus provides facility to add, publish new dependencies or jar files or any dependent files which will be used by projects. You can publish your jar files on this server so that it can be reused in other applications.

POM file : POM files has the details of the dependencies to run/use API or project. This file can also has details about project, jvm version, team members etc. POM also has the Plugins configurations, there are multiple plugins available to build, report, measure code quality, analyse dependencies and deploy.

Configuration and Getting the dependencies

Settings.xml : This file holds the configurations which is common for all Maven projects, like proxy details, repository server details, authentication details. So when you run the mvn command to build the project, maven search for the settings file in Maven Folder/conf/ and <user dir>/.m2/,  If both files exists, their contents gets merged, with the user-specific settings.xml being dominant.

Now maven know how to connect to server/internet (if required) and download the required dependencies, plugins etc.

POM.xml : In this file one can add the dependency details which looks like as

<dependency>
 <groupId>org.apache.tomcat</groupId>
 <artifactId>tomcat-jdbc</artifactId>
 <version>7.0.42</version>
 <scope>runtime</scope>
 </dependency>

GroupId, ArtifactID and version identifies the dependency uniquely, and based on these details  required file is get downloaded to .m2 directory which is your local repository, and from where the file is referred in your project.

What is SCOPE in dependency tag?

Most of the time I fund the people face problems as they havent tried to understand what this scope is for.

compile – this is the default scope, used if none is specified. Compile dependencies are available in all classpaths. Furthermore, those dependencies are propagated to dependent projects.

provided – this is much like compile, but indicates you expect the JDK or a container to provide it at runtime. It is only available on the compilation and test classpath, and is not transitive.

runtime – this scope indicates that the dependency is not required for compilation, but is for execution. It is in the runtime and test classpaths, but not the compile classpath.

test – this scope indicates that the dependency is not required for normal use of the application, and is only available for the test compilation and execution phases.

system – this scope is similar to provided except that you have to provide the JAR which contains it explicitly. The artifact is always available and is not looked up in a repository.

So based on your scope, jar or package files are referred in build process. e.g. provided and test scoped dependencies wont be added to your WAR file.

for more deatils : http://maven.apache.org/pom.html

You can exclude few of the dependencies which you wont needs to be downloaded/included from the child dependencies.

Basic commands

mvn clean install

mvn eclipse:configure-workspace
is used to add the classpath variable M2_REPO to Eclipse which points to your local repository and optional to configure other workspace features.

mvn eclipse:eclipse
generates the Eclipse configuration files.

mvn eclipse:clean
is used to delete the files used by the Eclipse IDE.

Few more commands

mvn dependency:tree -Dverbose -Dincludes=commons-collections

mvn verify

mvn dependency:analyze-only verify

mvn dependency:analyze-duplicate

mvn dependency:analyze-report

mvn site

Quick Start Guide: http://maven.apache.org/guides/getting-started/maven-in-five-minutes.html

Maven – Quick Start

Formatting Date in JavaScript

You can use built-in JavaScript object Date to do the date formatting in JS, you can also use Locales to format your date. I want to show date in mm/dd/yyyy hh:mm Z, I used simple trick, the format I am expecting is US format, and JS frovides API to convert Date to specific local, so I passed en-US as local parameter, and using options to get the desired output.

few of the options to instantiate Date

var today = new Date(); 
var myDate = new Date(dateString);

where dateString is string representing an RFC2822 or ISO 8601 date format e.g. 12/21/2014 00:00 GMT+5:30

Converting to Local

    var myDate = new Date();
    var options = { timeZoneName: 'short', hour : '2-digit', minute : &quot;2-digit&quot;, hour12: false};
    var dateStr = myDate.toLocaleString('en-US', options);

In options, I specified the timeZoneName which specifies if we want a short timezone name or long, hours, minutes and hour12 which specifies if the time needs to be shown in 12 hour format of 24 hours.

Other available options

  • weekday : [“narrow” | “short” | “long”]
  • era: [“narrow” | “short” | “long”]
  • year : [“2-digit” | “numeric”]
  • month : [“2-digit” | “numeric” | “narrow” | “short” | “long”]
  • day : [“2-digit” | “numeric”]
  • hour : [“2-digit” | “numeric”]
  • minute : [“2-digit” | “numeric”]
  • second : [“2-digit” | “numeric”]
  • timeZoneName : [“short” | “long”]

And if you need to format Date to more specific date format, then can use JS Date provided methods to get specific date elements like, day, year, month time etc.

   function padZero(dateArg) {
      if (dateArg &lt; 10) {
        return '0' + dateArg;
      }
      return dateArg;
   }
   
  function formateDate(date) {
    return date.getUTCFullYear() +
        '-' + padZero(date.getUTCMonth() + 1) +
        '-' + padZero(date.getUTCDate()) +
        ' ' + padZero(date.getUTCHours()) +
        ':' + padZero(date.getUTCMinutes()) +
        ':' + padZero(date.getUTCSeconds()) ;
  }

JSFiddle Code link

Formatting Date in JavaScript

Date field considerations for REST with different TimeZone

I can see two different scenarios of using the Date field with consideration of TimeZone, one is when the user enters date and you need to display the same date on screen, what I mean is with same TimeZone, and other one is the Date is entered by Admin kind of user from his TmeZone and you need to display the the saved Date with users TimeZone.

Simple work flow is

1) Select the Date and time from UI with TimeZone option (You can ignore TimeZone if you don’t want to display it to user, and while submitting or making REST request you can add the TimeZone details)

2) On server deserialize the date to UTC to persist the date filed

3) When GET request is made to the resource which has Date field, retrieve date from where you persisted, return it with the TimeZone details.

4) Client side, create Date instance from passed in date string, and JavaScript Date object will by default convert it to client specific TmeZone. You can use Date object and display your date in desired format.

In your bean filed annotate it as

	@JsonSerialize(using=JsonDateSerializer.class)
	public Date getJoinDate() {
		return joinDate;
	}

	@JsonDeserialize(using=JsonDateDeserializer.class)
	public void setJoinDate(Date joinDate) {
		this.joinDate = joinDate;
	}

Java Code to Deserialize JSON to Date

import java.io.IOException;
import java.text.ParseException;
import java.text.SimpleDateFormat;
import java.util.Date;
 
import com.fasterxml.jackson.core.JsonLocation;
import com.fasterxml.jackson.core.JsonParseException;
import com.fasterxml.jackson.core.JsonParser;
import com.fasterxml.jackson.core.JsonProcessingException;
import com.fasterxml.jackson.core.ObjectCodec;
import com.fasterxml.jackson.databind.DeserializationContext;
import com.fasterxml.jackson.databind.JsonDeserializer;
import com.fasterxml.jackson.databind.JsonNode;
 
@Component
public class JsonDateDeserializer extends JsonDeserializer<Date> {
 
 private static final SimpleDateFormat dateFormat = new SimpleDateFormat("MM/dd/yyyy hh:mm ZZ");
 
 @Override
 public Date deserialize(JsonParser jp, DeserializationContext ctxt)
 throws IOException, JsonProcessingException {
 
 ObjectCodec oc = jp.getCodec();
 JsonNode node = oc.readTree(jp);
 
 String dateString = node.asText();
 
 Date joinDate;
 try {
 joinDate = dateFormat.parse(dateString);
 } catch (ParseException e) {
 throw new JsonParseException(e.getMessage(), JsonLocation.NA);
 }
 
 return joinDate;
 }
 
}

in above screen I used final static for SimpleDateFormat, SimpleDateFormat class is not thread safe, and I FastDateFormat which is good alternative to SimpleDateFormat which is used in serialize code snippet listed below. You can also use JodaTime api for date and calendar manipulations, ideally you should not use SimpleDateFormat and instead should move to Apache Commons-lang date implementations and if you need full support of parsing and formatting then use JodaTime library.

To serialize from Date to JSON

import java.io.IOException;
import java.util.Date;
import java.util.TimeZone;
 
import org.apache.commons.lang.time.FastDateFormat;
import org.springframework.stereotype.Component;
 
import com.fasterxml.jackson.core.JsonGenerator;
import com.fasterxml.jackson.core.JsonProcessingException;
import com.fasterxml.jackson.databind.JsonSerializer;
import com.fasterxml.jackson.databind.SerializerProvider;
 
@Component
public class JsonDateSerializer extends JsonSerializer<Date>{
 
 private FastDateFormat fastDateFormat = FastDateFormat.getInstance("MM/dd/yyyy hh:mm Z", TimeZone.getTimeZone("UTC"));
 
 @Override
 public void serialize(Date date, JsonGenerator gen, SerializerProvider provider) throws IOException, JsonProcessingException {
 
 String formattedDate = fastDateFormat.format(date);
 gen.writeString(formattedDate);
 }
}

In above code I have created the FastDateFormat instance with UTC TimeZone, and to add timezone details I added “Z”, which will add the timezone details in RFC822 format i.e. +0530.

In my example I displayed Date as it is default get converted to string by using JavaScript built-in object Date.

If you want to display the Date (particularly with time) at client as per Locale and with very specific format, will suggest to do the formatting on Java side based on user locale and timezone, as formatting Date in JavaScript to a specific format is tricky. JavaScript has good support for formatting date to Local but if you want some different format then it become tricky, e.g. with en-US the date time will displayed as 12/21/2014, 12:00 AM GMT+5:30, and now if you want to remove comma and different timezone format then it become tricky.

form more details : JavaScipt Date Tutorial

Date field considerations for REST with different TimeZone

REST PUT Vs POST

Actually its nothing to do with REST for PUT and POST. In general how HTTP PUT works and how POST work, is what I want to demonstrate through code.

Why REST is considered, usually we get confused while developing REST API, that when to use PUT and when to use POST for update and insert resource.

Lets start with the actual definition of these methods (copied form http://www.w3.org/Protocols/rfc2616/rfc2616-sec9.html)

POST

The POST method is used to request that the origin server accept the entity enclosed in the request as a new subordinate of the resource identified by the Request-URI in the Request-Line.

The actual function performed by the POST method is determined by the server and is usually dependent on the Request-URI. The posted entity is subordinate to that URI in the same way that a file is subordinate to a directory containing it, a news article is subordinate to a newsgroup to which it is posted, or a record is subordinate to a database.

The action performed by the POST method might not result in a resource that can be identified by a URI. In this case, either 200 (OK) or 204 (No Content) is the appropriate response status, depending on whether or not the response includes an entity that describes the result.

If a resource has been created on the origin server, the response SHOULD be 201 (Created) and contain an entity which describes the status of the request and refers to the new resource, and a Location header (see section 14.30).

Responses to this method are not cacheable, unless the response includes appropriate Cache-Control or Expires header fields. However, the 303 (See Other) response can be used to direct the user agent to retrieve a cacheable resource.

PUT

The PUT method requests that the enclosed entity be stored under the supplied Request-URI. If the Request-URI refers to an already existing resource, the enclosed entity SHOULD be considered as a modified version of the one residing on the origin server. If the Request-URI does not point to an existing resource, and that URI is capable of being defined as a new resource by the requesting user agent, the origin server can create the resource with that URI. If a new resource is created, the origin server MUST inform the user agent via the 201 (Created) response. If an existing resource is modified, either the 200 (OK) or 204 (No Content) response codes SHOULD be sent to indicate successful completion of the request. If the resource could not be created or modified with the Request-URI, an appropriate error response SHOULD be given that reflects the nature of the problem. The recipient of the entity MUST NOT ignore any Content-* (e.g. Content-Range) headers that it does not understand or implement and MUST return a 501 (Not Implemented) response in such cases.

If the request passes through a cache and the Request-URI identifies one or more currently cached entities, those entries SHOULD be treated as stale. Responses to this method are not cacheable.

The fundamental difference between the POST and PUT requests is reflected in the different meaning of the Request-URI. The URI in a POST request identifies the resource that will handle the enclosed entity. That resource might be a data-accepting process, a gateway to some other protocol, or a separate entity that accepts annotations. In contrast, the URI in a PUT request identifies the entity enclosed with the request — the user agent knows what URI is intended and the server MUST NOT attempt to apply the request to some other resource. If the server desires that the request be applied to a different URI.

Lets Go back to our REST example

Ok, now to make it more clear in REST terms, lets consider a example of Customer and Order scenario, so we have API to create/modify/get customer but for order we do have create order for customer and when we call GET /CustomerOrders API will get the customer orders.

APIs we have

GET /Customer/{custID}

PUT /Customer/{custID}

POST /Customer custID will be part of the HTTP body (to demonstrate difference between POST and PUT, otherwise for stated requirement it wont required)

POST /Order/{custID}

GET /CustomerOrders/{custID}

I have enable browser cache by adding header “Cache-Control”. so lets first see flow of PUT and GET for customer

Initial load, I called PUT /Customer/1 which placed new resource on server and then called GET /Customer/1 which returned me the customer I placed. now when I again call the GET /Customer/1 I will get the browser “Cached” instance of customer.

Now you call PUT /Customer/1 with updated values of customer, and then call GET /Customer/1, you will observer that browser makes calls to server to get new changed values. and if you add debug point or increase the wait time in you PUT, and make parallel request for GET (Ajax), then GET request will be pending till PUT is served, so browser makes cached instance of resource to stale.

In case of POST, new resource will be posted to server, but if POST request is not served, and you request for same resource using GET, cached instance will be returned. Once the post is successful and you make GET call to the resource, browser will hit to server to get new resource.

I added delay of 100 milliseconds in both PUT and POST and made request as

1) Called GET /Customer/1 multiple times to check if I am getting cached resource. Then I called PUT, and immediately called GET, and GET was pending till PUT is served. below if the screen shot which explains it.

PUTGet

2) Called GET /Customer/1 multiple times to check if I am getting cached resource. Then I called POST, and immediately called GET, and GET was served from cache. below if the screen shot which explains it.

POSTGet

So example explains all, so in our customer order case, customer should be PUT for new customer and for updating customer as we are retrieving the customer using same resource URI but for Order we used POST as we don’t have same URI for GET orders.

One More Example for PUT

You have a site which hosts different articles and documents. Client has sent request to create new documents which has title “WhyToUsePutForCreation” then your request will look like PUT /article/WhyToUsePutForCreation and once the application creates it, application will respond with 201. i.e. resource created. Now from client I can list the new document in documents list and which will be fetched by calling GET /article/WhyToUsePutForCreation

Download Code

Strange Browser Behavior : If I increase the delay in PUT method to 1000 milliseconds. First I made request to PUT /Customer/1, and immediately sent request for GET,  browser wait for PUT to get complete and after that GET request returns either cached resource or calls the server to get new resource.

I tried with different delay time, and it is not fixed behavior of Browser about, when to return the cached resource (old one) and when to request resource from server.

I am not sure if this is correct behavior, but I think its a problem with browser if I consider description of PUT.

REST PUT Vs POST

Spring’s Device Detection (Spring Boot) Vs WURFL Device detection

I liked the Spring Boot idea very much, very impressive. Excellent use of Embedded servers, auto configs and the best thing with less code you can complete the functionality.

When I was going through the basic guides of Spring boot, I tried the Device Detection guide, which detects the the device from which the request is made, its basic implementation which tells you if request is made form Mobile, Tab or PC.

Spring Device has used the “User-Agent”, “x-wap-profile”, “Accept” HTTP headers to detect the device type, if all of the listed headers fails to identify the device type, in the last code iterate through all the headers to see if the request is from “Opera Mini” browser, which mostly used by many mobile users.

Spring Device has used basic algorithm used in WordPress’s Mobile pack, which works for large number of mobile browsers.

If you need to know full capabilities of the phone, like OS type, touch screen support, browser type, XHTML-MP supprted or not etc then WURFL API is a good option.

Only thing is WURFL API is not updated for the Spring Boot and uses old version of commons-lang and other dependent libraries. As source code is provided I modified a bit and I was able to use the WURFL API for device detection.

WURFL has commercial license available and also has cloud based service if you want to try.

You can download the code from the WURFL’s repository, to create GeneralWURFLEngine class as spring componant I added @Component annotation

@Component(value="WURFLEngine")public class GeneralWURFLEngine implements WURFLEngine, WurflWebConstants {

and it dosent have default constructor, I added one with following lines, where wurfl.zip file has the XML file which has all data related to mobile devices.

 static URL filePath = GeneralWURFLEngine.class.getClassLoader().getResource("wurfl.zip");
  
 public GeneralWURFLEngine() {
 this(new XMLResource(filePath.getPath()));
 }

and when I started the Spring Boot Application, I added the package of the GeneralWURFLEngine class to component scan path, and one more major change, as Maven repository for WURFL is only available if you license, I added jar in /lib folder.

Below is the code changed made to Spring Boot guide for device detection.

package com.ykshinde.controller;
 
import javax.annotation.Resource;
import javax.servlet.http.HttpServletRequest;
 
import net.sourceforge.wurfl.core.WURFLEngine;
 
import org.springframework.mobile.device.Device;
import org.springframework.stereotype.Controller;
import org.springframework.web.bind.annotation.RequestMapping;
import org.springframework.web.bind.annotation.ResponseBody;
 
@Controller
public class DeviceDetectionController {
 
    @Resource(name="WURFLEngine")
    WURFLEngine engine;
     
    @RequestMapping("/detect-device")
    public @ResponseBody String detectDevice(Device device, HttpServletRequest request) {
         
        net.sourceforge.wurfl.core.Device device2 = engine.getDeviceForRequest(request);
         
        StringBuffer deviceCapabilities = new StringBuffer();
 
        deviceCapabilities.append(" DEVICE_ID : ").append(device2.getId()).append("<br>")
        .append(" DEVICE_OS : ").append(device2.getCapability("device_os")).append("<br>")
        .append(" DEVICE_OS_VERSION : ").append(device2.getCapability("device_os_version")).append("<br>")
        .append(" IS_TABLET : ").append(device2.getCapability("is_tablet")).append("<br>")
        .append(" IS_WIRELESS_DEVICE : ").append(device2.getCapability("is_wireless_device")).append("<br>")
        .append(" MOBILE_BROWSER : ").append(device2.getCapability("mobile_browser")).append("<br>")
        .append(" MOBILE_BROWSER_VERSION : ").append(device2.getCapability("mobile_browser_version")).append("<br>")
        .append(" POINTING_METHOD : ").append(device2.getCapability("pointing_method")).append("<br>")
        .append(" PREFERRED_MARKUP : ").append(device2.getCapability("preferred_markup")).append("<br>")
        .append(" RESOLUTION_HEIGHT : ").append(device2.getCapability("resolution_height")).append("<br>")
        .append(" RESOLUTION_WIDTH : ").append(device2.getCapability("resolution_width")).append("<br>")
        .append(" UX_FULL_DESKTOP : ").append(device2.getCapability("ux_full_desktop")).append("<br>")
        .append(" XHTML_SUPPORT_LEVEL : ").append(device2.getCapability("xhtml_support_level")).append("<br>");
         
         
        String deviceType = "unknown";
        if (device.isNormal()) {
            deviceType = "normal";
        } else if (device.isMobile()) {
            deviceType = "mobile";
        } else if (device.isTablet()) {
            deviceType = "tablet";
        }
         
        deviceCapabilities.append(" DEVICE TYPE (SPRING BOOT) : ").append(deviceType);
         
        return deviceCapabilities.toString();
    }
 
}

And below is the response displayed when request emulated as from “Samsung Tab ”


DEVICE_ID : samsung_galaxy_tab_ver1_subschi800
DEVICE_OS : Android
DEVICE_OS_VERSION : 2.2
IS_TABLET : true
IS_WIRELESS_DEVICE : true
MOBILE_BROWSER : Android Webkit
MOBILE_BROWSER_VERSION :
POINTING_METHOD : touchscreen
PREFERRED_MARKUP : html_web_4_0
RESOLUTION_HEIGHT : 1024
RESOLUTION_WIDTH : 600
UX_FULL_DESKTOP : false
XHTML_SUPPORT_LEVEL : 4
DEVICE TYPE (SPRING BOOT) : mobile

NOTE : If you are going to use WURFL Api commercially, please do check the licensing part of it.

 Download Code

Spring’s Device Detection (Spring Boot) Vs WURFL Device detection